ThinkCentre BIOS Unlock / Mod - [14.11.2024]
Introduction
This guide will explain all steps necessary to Unlock or Mod a Lenovo BIOS. The guide might work for other Mainboards/BIOS too but its not guaranteed.
Currently Tested
- M720q
- M920q
- M920x
Prerequisites / Tools
Step 1 - Dump BIOS
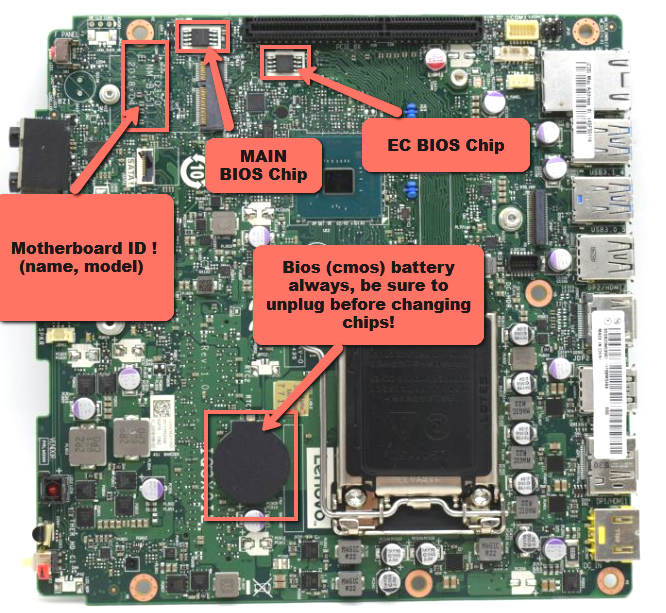
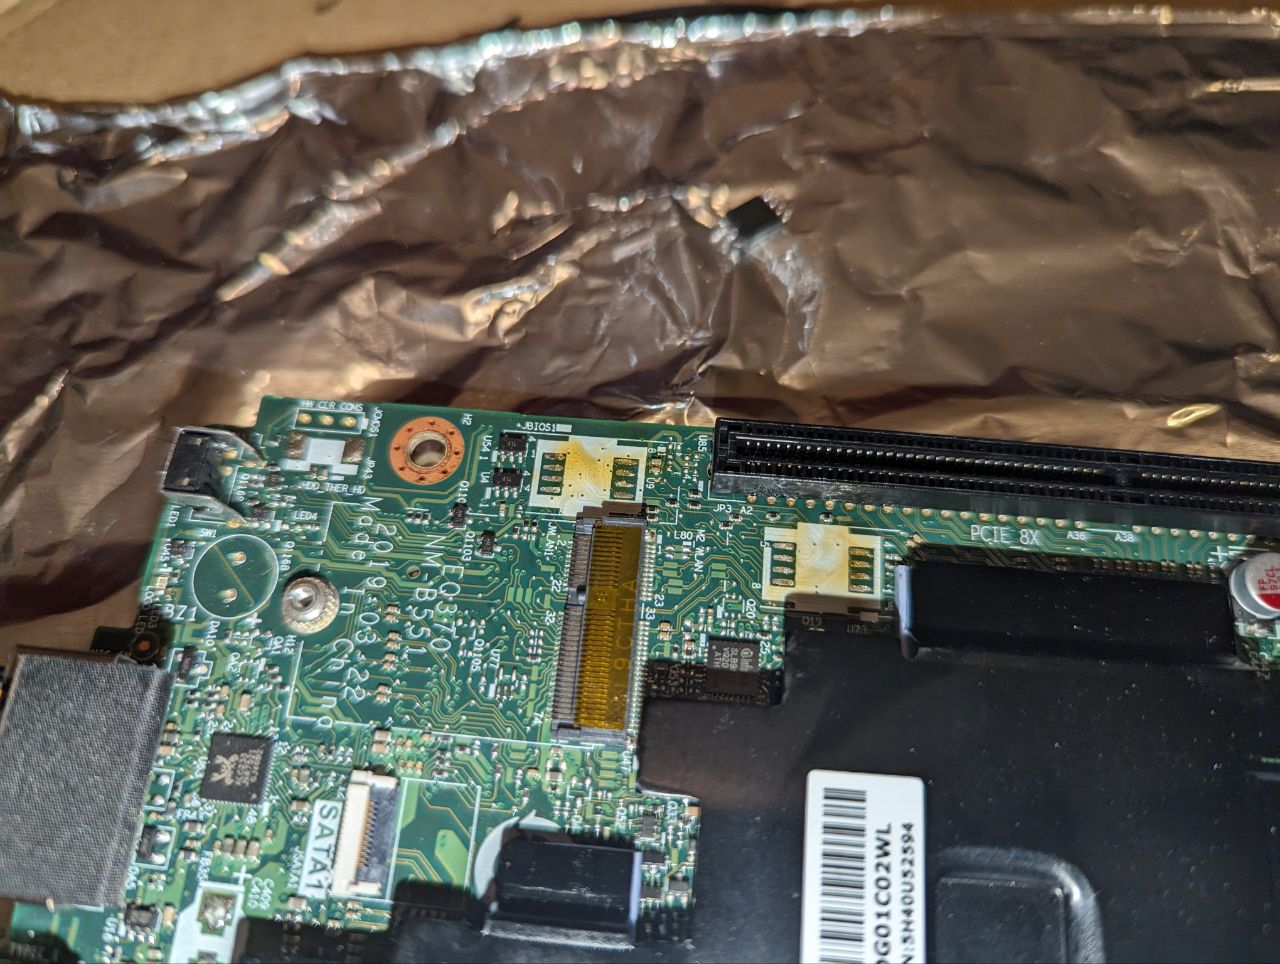
Step 1.1 - Identify BIOS Chip
Identify whether you have a single or split BIOS: - Main BIOS Chip: Winbond 25Q128FV or compatible - EC/ME BIOS Chip: Winbond 25Q64FV or compatible
Step 1.2 - Desolder BIOS Chips
Note
Skip this step if you have a single BIOS
If you have two BIOS Chips you need to desolder both of them. It's not possible to get a proper dump of the BIOS Chips because of the Embedded Controller.
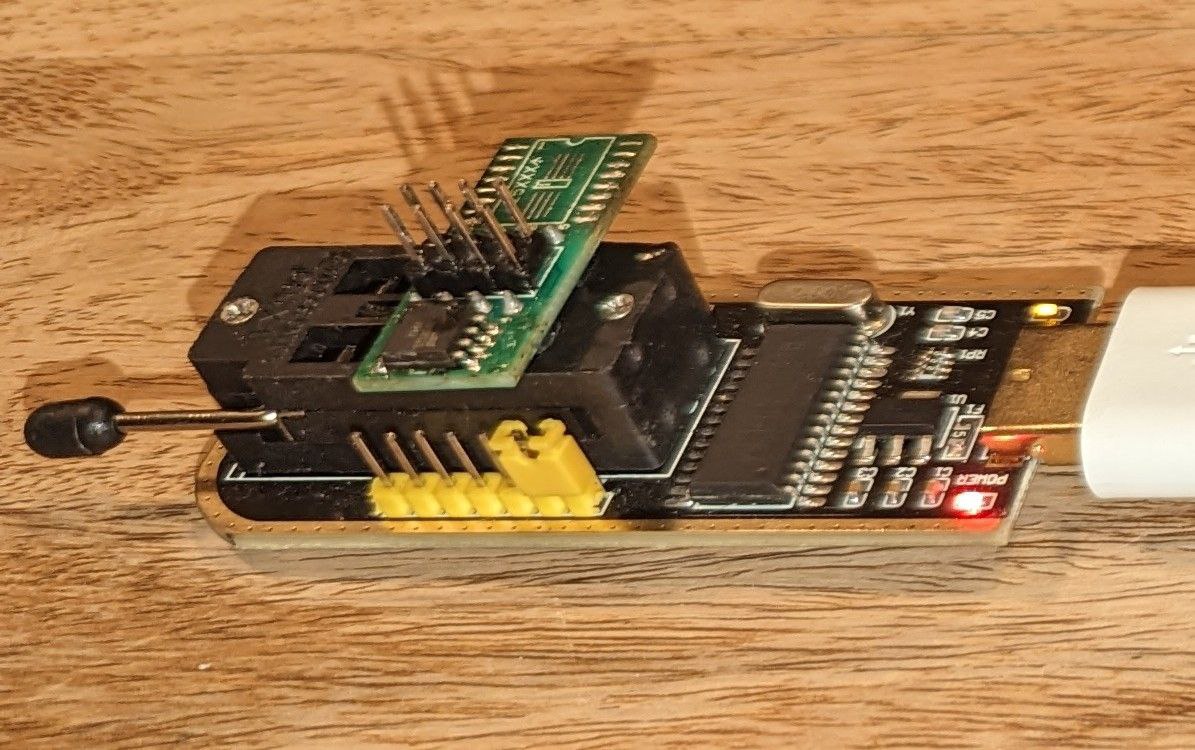
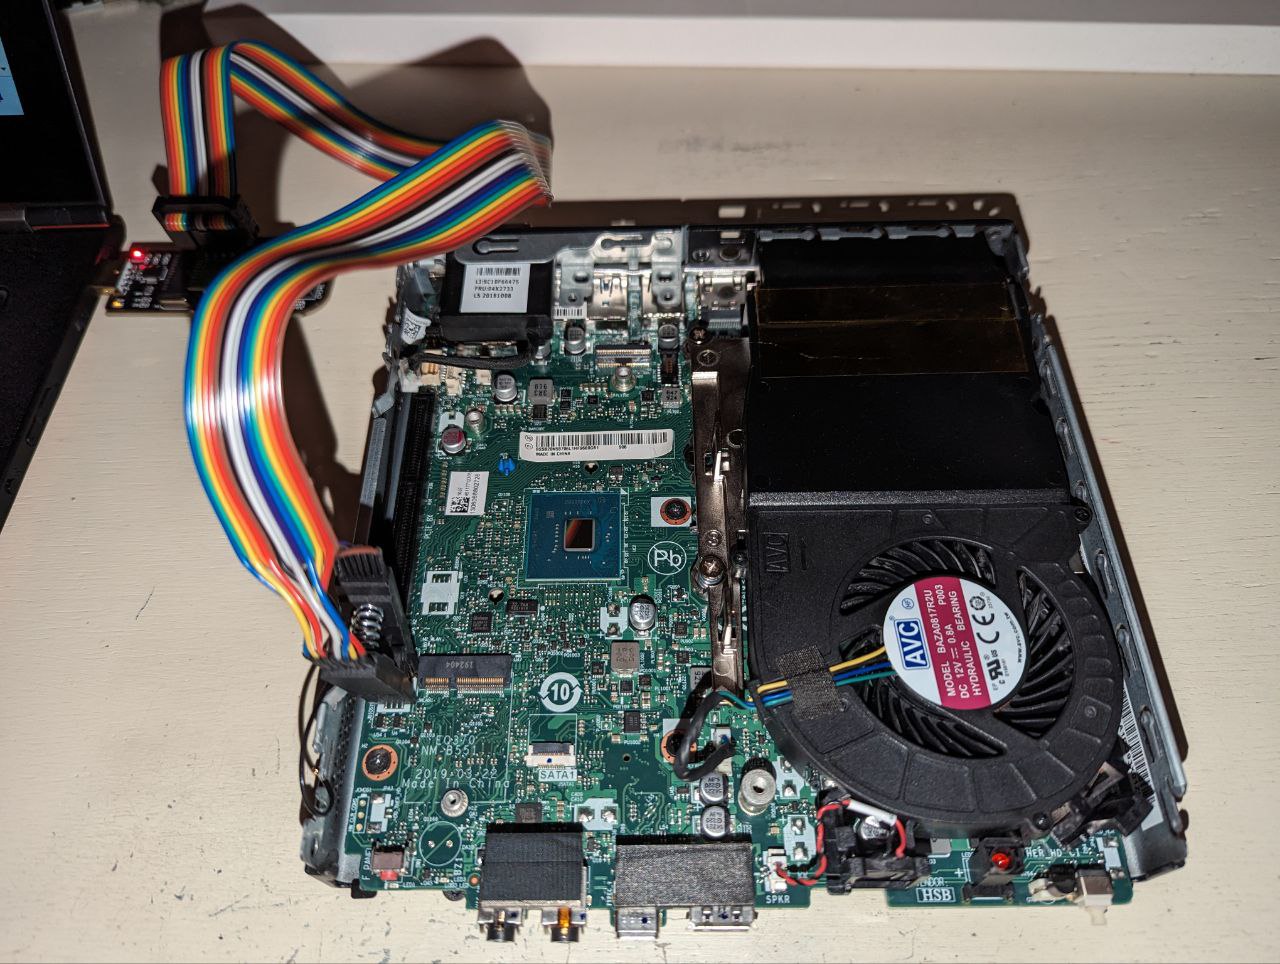
Step 1.2.1 - Connect CH341a
Connect the CH341a programmer to the BIOS Chip (either directly to the Mainboard or to an external reader).
Step 1.3 - Dump BIOS via flashrom (or similar)
Danger
Dump BIOS TWICE and compare checksums
Dump single BIOS
Dump split BIOS
Connect Main BIOS Chip
Connect EC/ME BIOS Chip
Step 1.4 - Backup BIOS dump
Warning
If the BIOS gets corrupted without a backup, your Mainboard becomes a paperweight.
Backup the previously dumped BIOS binaries to a safe location.
Step 1.5 - Merge BIOS dump
Note
Skip this step if you have a single BIOS
This will effectively combine the split BIOS to a single BIOS dump.
Step 2 - Prepare BIOS for Modding / Unlocking
Step 2.1 - Import Dump
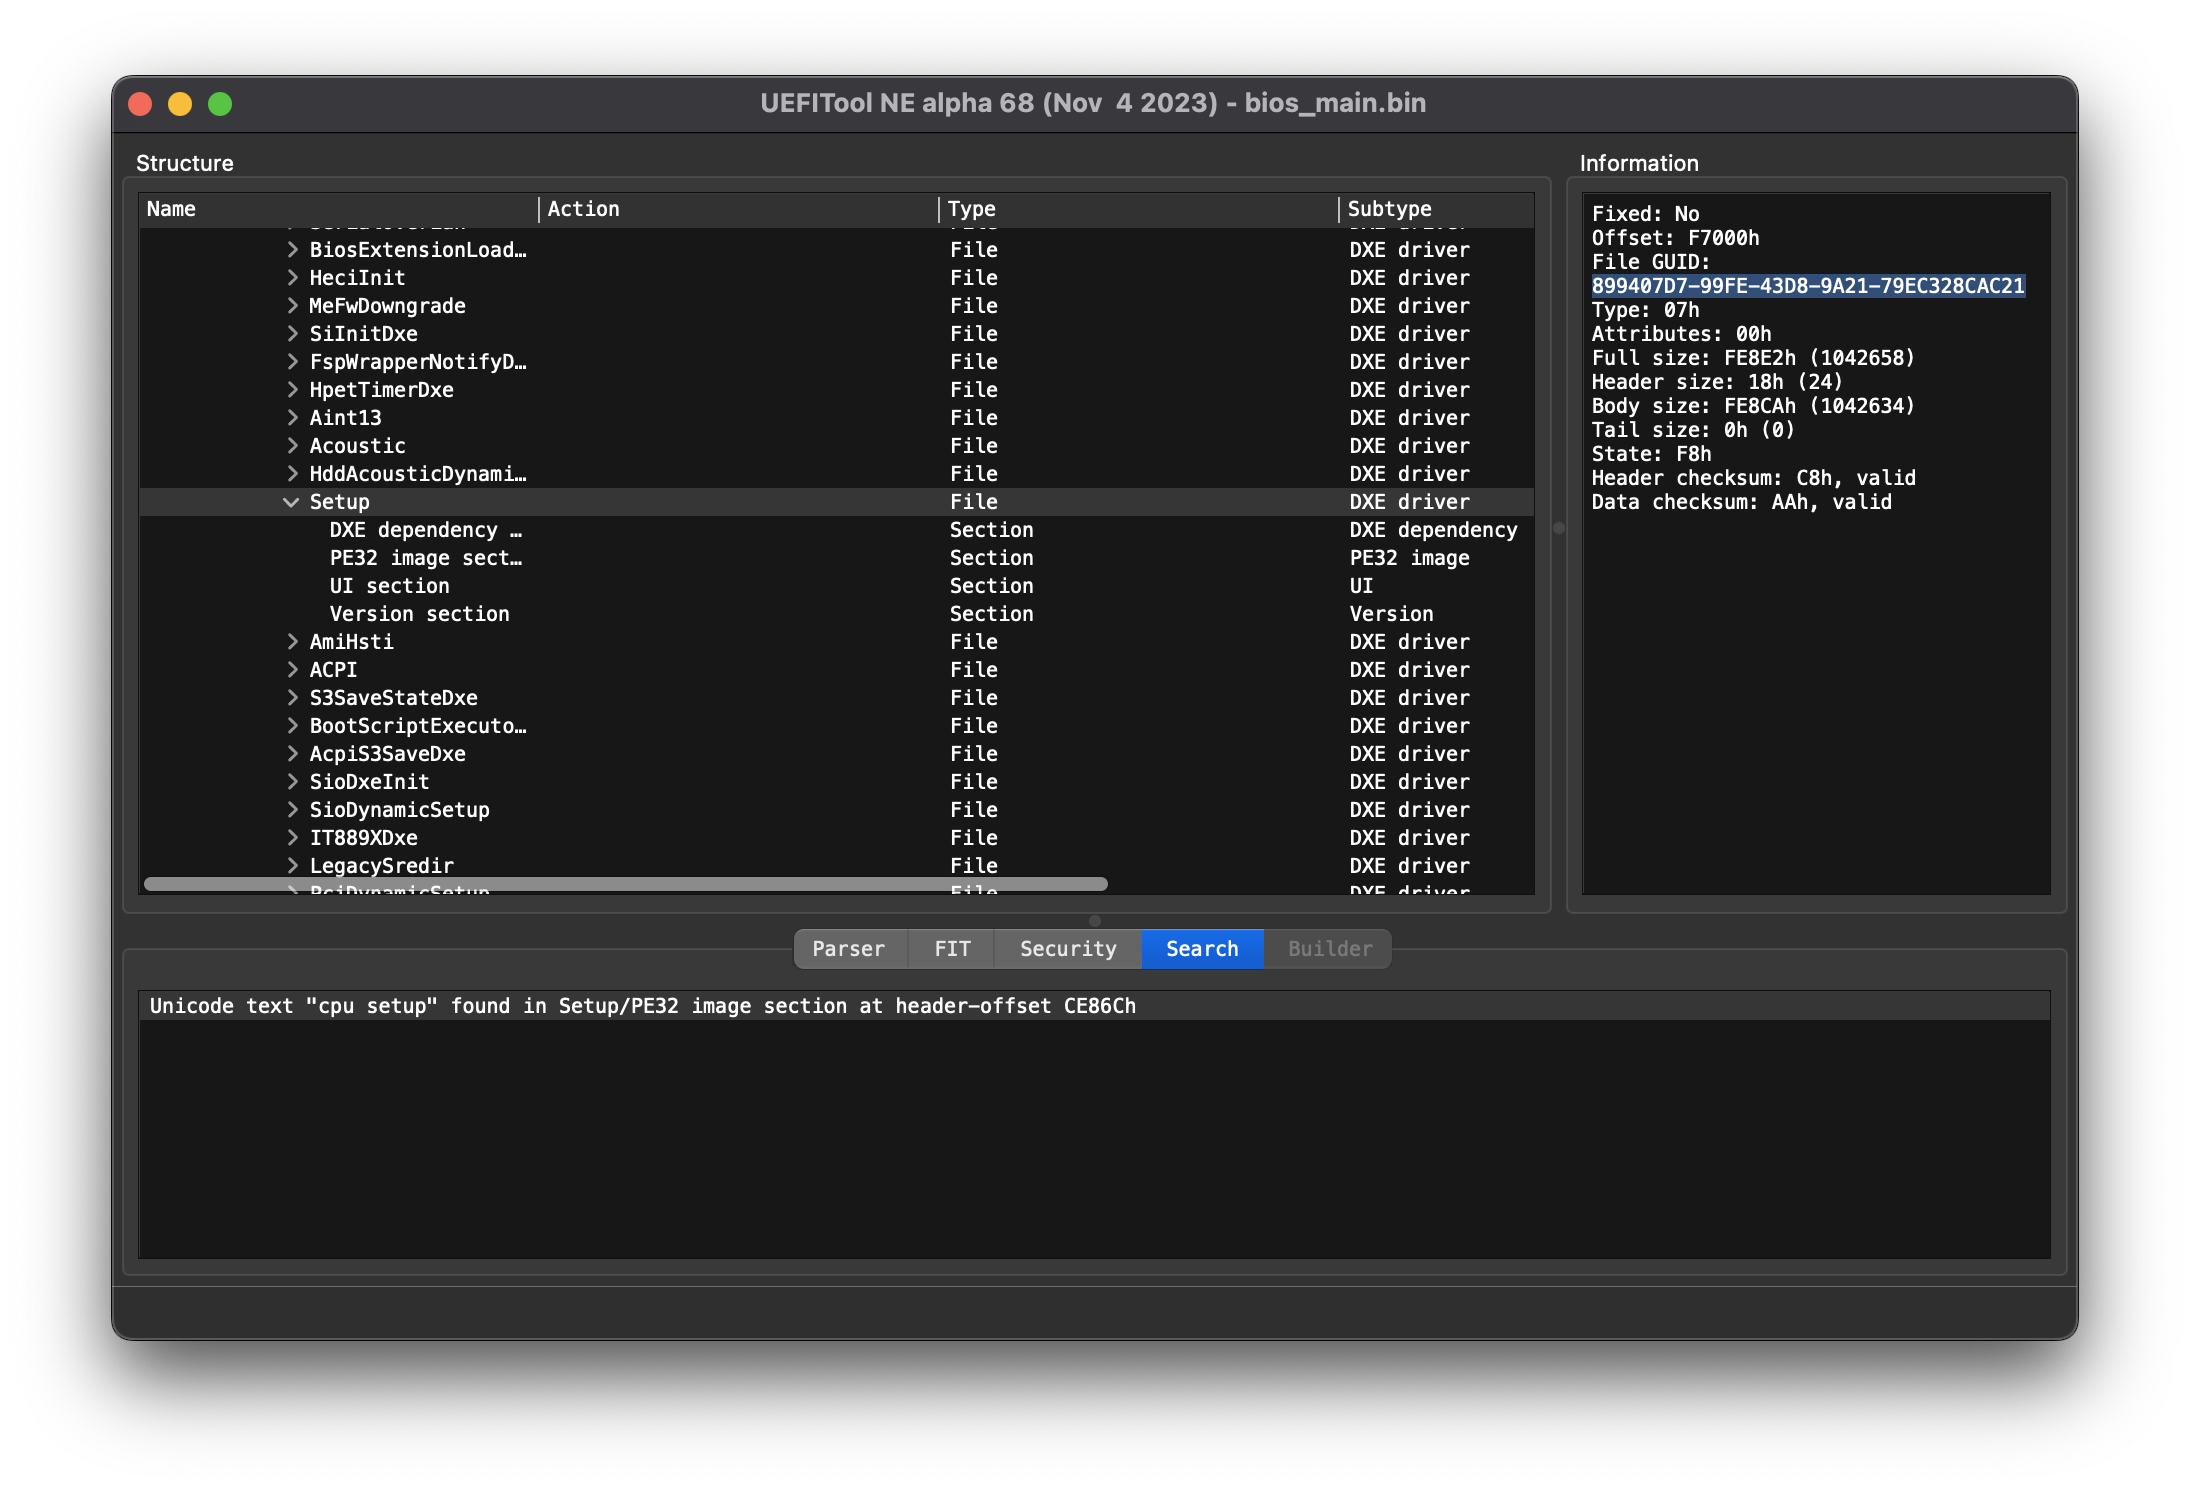
Open bios_main.bin in UEFITool NE.

Step 2.2 - Find UI Section
Search (CTRL + F) for a known setting, e.g. "cpu setup" in the "Text" tab.

Double-click the reference to Setup/PE32 image section at the bottom.

Step 2.3 - Extract BIOS Section
Extract PE32 image section "as is".

Scroll down inside the currently expanded section and find AMITSE and setupdata.

Extract AMITSE PE32 image section "as is".

Extract setupdata setupdata "body".

Step 2.4 - Extract IFR Data
Move ifrextractor to the current folder, open the CLI inside and convert the first .sct file you extracted.
Step 3 - Modding / Unlocking BIOS
Step 3.1 - Modify BIOS in UEFI Web Editor
- Upload the extracted files to UEFI Web Editor.
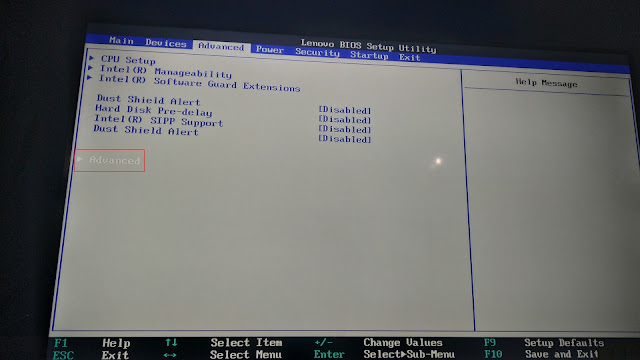
- Find the option you want to unlock or edit. Navigate UEFI Editor
- Click the
Suppress IfHex Value on the option you want to enable (hereAdvanced) in the BIOS.

Note
You might also want to unlock the Chipset Section under Devices to be able to disable FPRR (Flash Protection Range Registers) later.
- Click the "UEFI Files" button on the bottom of the page to download the modified BIOS section and the changelog.
Step 3.2 - Write modified Section to BIOS dump
Open the untouched bios_main.bin in UEFITool 0.28.0.
To find the correct section in UEFITool 0.28.0, you can search for the GUID which you get from UEFITool NE.

Replace the section the same way you extracted them in UEFITool NE (Extract as is -> Replace as is on the PE32 image section):

It should say PE32 image section Remove and PE32 image section Replace.
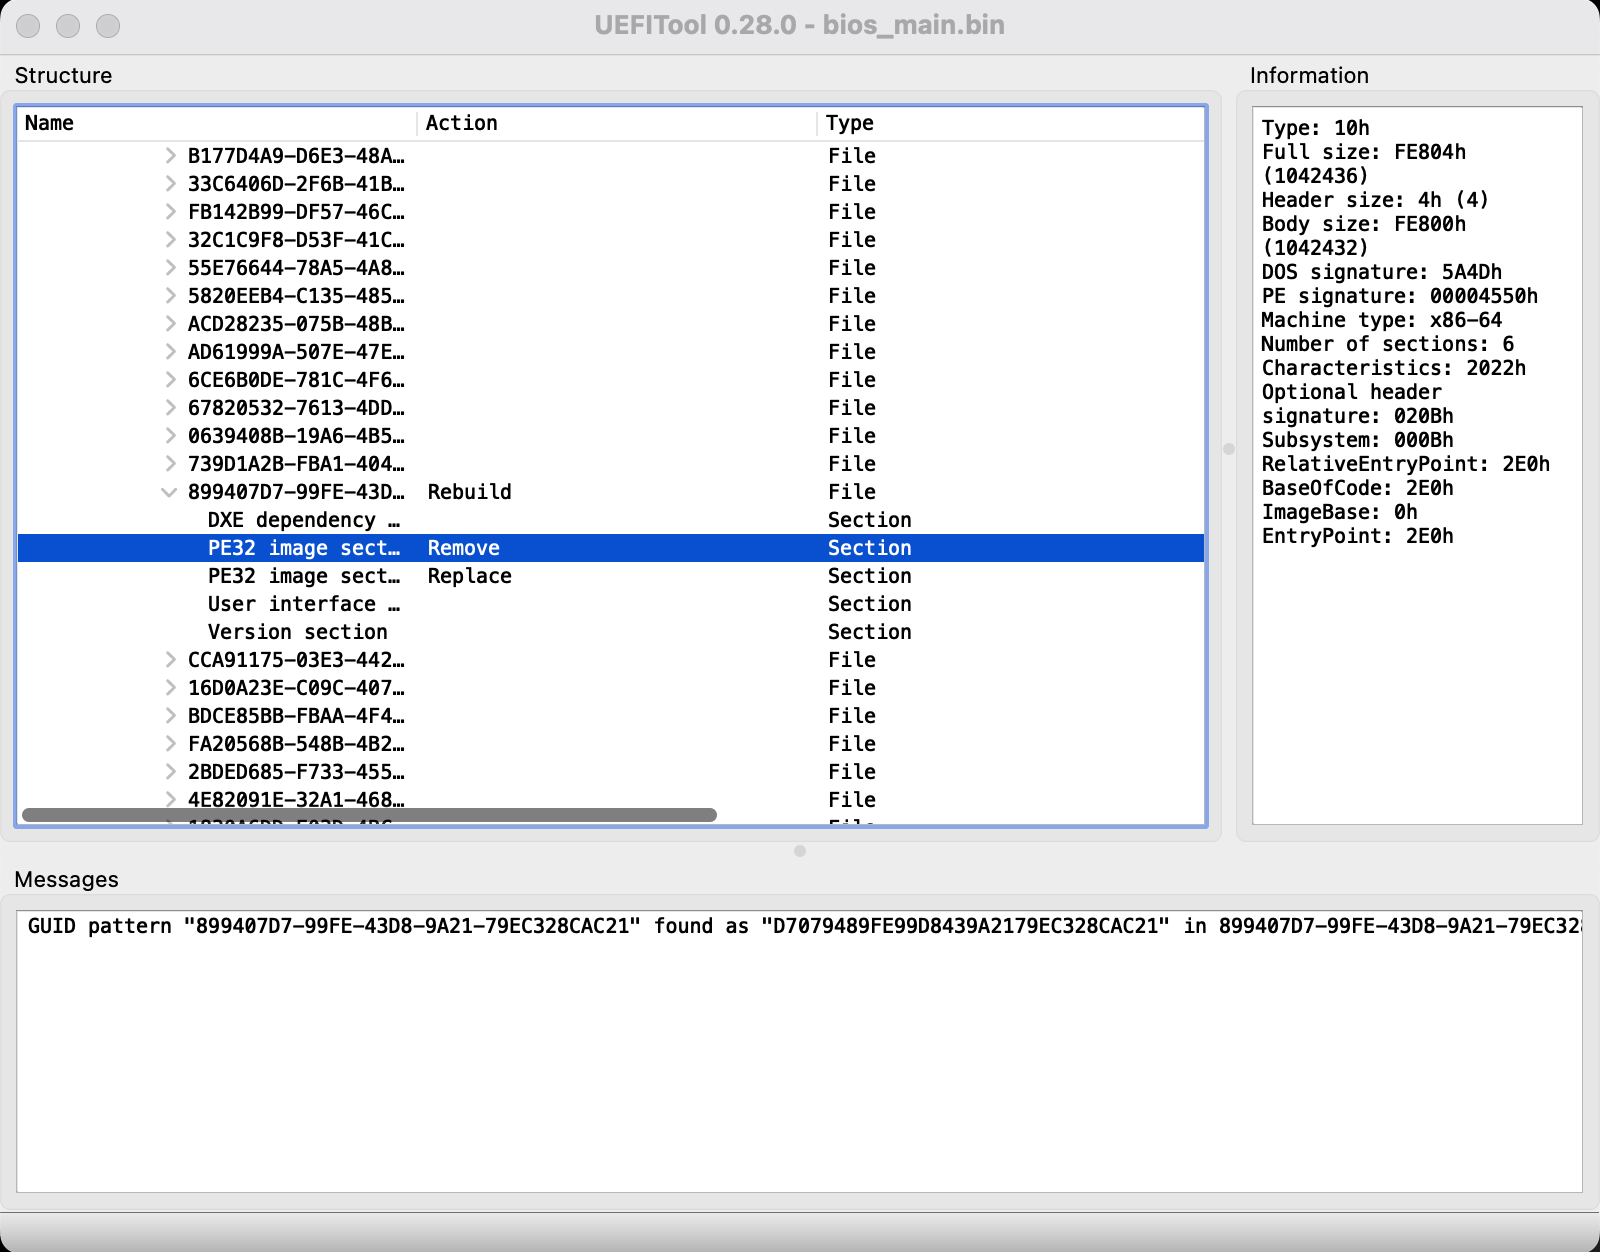
Save the modified BIOS as bios_main_mod.bin.

Step 3.3 - Additional mods
Now its time to make additional modifications to the BIOS.
e.g. unlock the FD Unlock FD (winraid.level1techs.com)

Step 4 - Flash BIOS
Step 4.1 - Split BIOS
Note
Skip this step if you have a single BIOS
Prepare Main BIOS Chip file
Prepare EC/ME BIOS Chip file
Step 4.2 - Connect CH341a
Connect the CH341a programmer to the BIOS Chip (again either directly or to the desoldered Chips).
Step 4.3 - Flash BIOS via flashrom (or similar)
Flash single BIOS
Flash split BIOS - 25Q128FV > bios_first_mod.bin (16MB) - 25Q64FV > bios_second_mod.bin (8MB)
Connect Main BIOS Chip
Connect EC/ME BIOS Chip
Step 4.4 - Solder BIOS Chips
Note
Skip this step if you have a single BIOS
Solder the BIOS Chips back to the Mainboard Check Step 1.1.
Step 5 - Test Modded BIOS
Step 5.1 - Boot and Verify
Disconnect CH341a programmer and connect the Power Supply.
Press F1 to enter BIOS.
The ThinkCentre should now have the new unlocked BIOS Settings.
Note
If your ThinkCentre should not start anymore or beep (in my case 3x long 1x short), something went wrong. You should try to erase and flash the original bios_main.bin or bios_(first/second).bin again to test it with the original dumps.
Step 6 - Unlock Full Power
Important
This section is dangerous. Im not yet 100% sure how everything works!
Step 6.1 - Disable 800Mhz Throttle caused by BD PROCHOT
[ Section updated on 14.11.2024 ]
You can disable the BD PROCHOT in the BIOS under Advanced > Advanced > Thermal Configuration > Cpu Thermal Configuration > Bi-directional PROCHOT#.
This setting is there so every part of the System can call the CPU to throttle to 800Mhz.
Disabling it will make the CPU Throttle only at 100°C.
Alternative (now preferred by myself)
You can also control BD PROCHOT from the OS. I wrote a small script which runs after boot.
Note
Requirements:
- disable Secure Boot
- install
msr-tools
#!/bin/bash

# default 2883677 (PROCHOT ON)

# Check if argument is provided
if [ $# -ne 1 ]; then
    echo "Usage: $0 <0|1>"
    echo "  0 - Turn off PROCHOT (disable throttling)"
    echo "  1 - Turn on PROCHOT"
    exit 1
fi

# Load MSR module if not loaded
if ! lsmod | grep -wq msr; then
    modprobe msr
fi

# Read current value from MSR
current_value=$(rdmsr 0x1FC)

# Convert hexadecimal to decimal
current_id=$(printf "%d" 0x$current_value)

# Decide whether to turn on or off PROCHOT
if [ "$1" -eq 0 ]; then
    echo "Turning off PROCHOT"
    new_id=$((current_id & ~1))  # Set LSB to 0
elif [ "$1" -eq 1 ]; then
    echo "Turning on PROCHOT"
    new_id=$((current_id | 1))  # Set LSB to 1
else
    echo "Invalid argument: $1"
    exit 1
fi

# Write new value to MSR
wrmsr 0x1FC $new_id
Step 6.2 - Set CPU Thermal throttling to specific temperature
You can adjust the temperature threshold for CPU thermal throttling using the undervolt tool.
Run undervolt.py --temp 85 or set it as system service.
Systemd Service Files
/etc/systemd/system/prochot.service
[Unit]
Description=Disable Prochot

[Service]
ExecStart=/usr/bin/bash -c '/usr/local/sbin/prochot.sh 0'

[Install]
WantedBy=multi-user.target
/etc/systemd/system/undervolt.service
[Unit]
Description=undervolt.py target temperature

[Service]
ExecStart=/bin/bash -c '/usr/local/sbin/undervolt.py --temp 85'

[Install]
WantedBy=multi-user.target
TODO
- How to change the TDP
- How to flash the BIOS via FPT (currently throws Error 167)
Conclusion
There are always more options to explore and unlock. But be careful not to destroy anything.
I take no responsibility if something goes wrong when you follow this guide.
It's been some time since I worked on this project. Please note that I can only provide the information that's already mentioned here.